
Dryer Not Heating Up? Diagnose It Before Calling a Tech

You pull the load out after a full 45-minute cycle and everything's still damp. The drum's a little warm from all that tumbling friction, but there's no real heat, and you know it. If this is where you're at, here's the good news: a dryer that runs its whole cycle but won't heat is almost never a "the whole machine is dead" situation. It's one specific link in a heat chain that's failed, and you can usually isolate which one in under 15 minutes without touching anything electrical.
This isn't a list of possible causes in random order. It's a sequence. Work through it top to bottom and you'll land on the answer faster than a service call would even get scheduled.
First, Confirm It's Actually a Heat Problem (Not a Load or Setting Problem)
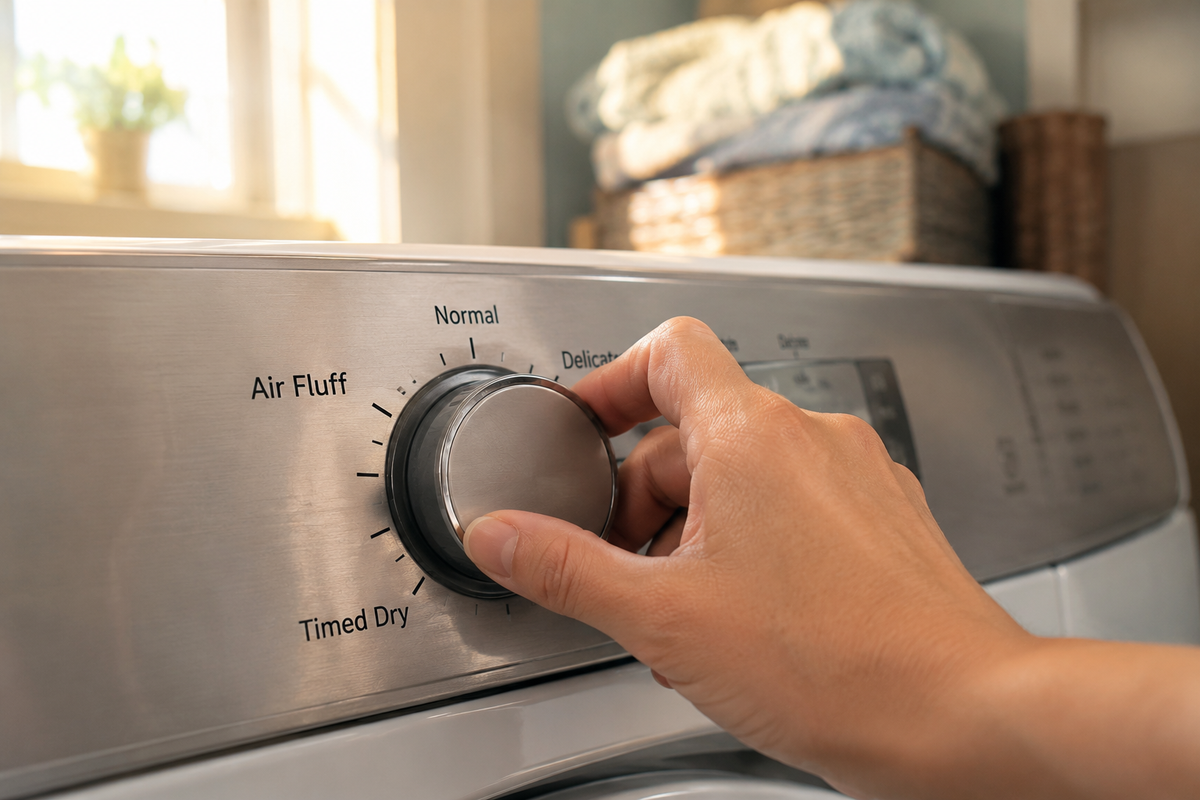
Before you assume a part failed, rule out the boring stuff. It happens more than people admit.
Check the cycle selector. "Air Fluff," "No Heat," or "Tumble Only" settings are easy to bump, especially if kids or houseguests have been near the machine.
Next, look at the load itself. A dryer stuffed past roughly three-quarters of the drum, or packed with sopping-wet towels straight out of the wash, will struggle to dry even with a perfectly healthy heating system. Wring or spin heavy items first. Both Whirlpool and Maytag flag overloading and over-wet loads as common false alarms in their own troubleshooting guidance.
Then go outside and feel the exhaust vent while the dryer runs. Warm air there but nothing in the drum points somewhere different than no warm air anywhere at all. That distinction matters for the next step.
One more trick, and it's not something you'll find in a manufacturer FAQ: run a single towel or an old tennis shoe through a short cycle as a controlled test load. It strips out the variables of a big, mixed, uneven load and gives you a cleaner read on whether heat is present at all.
Gas or Electric? Your Diagnostic Path Splits Here
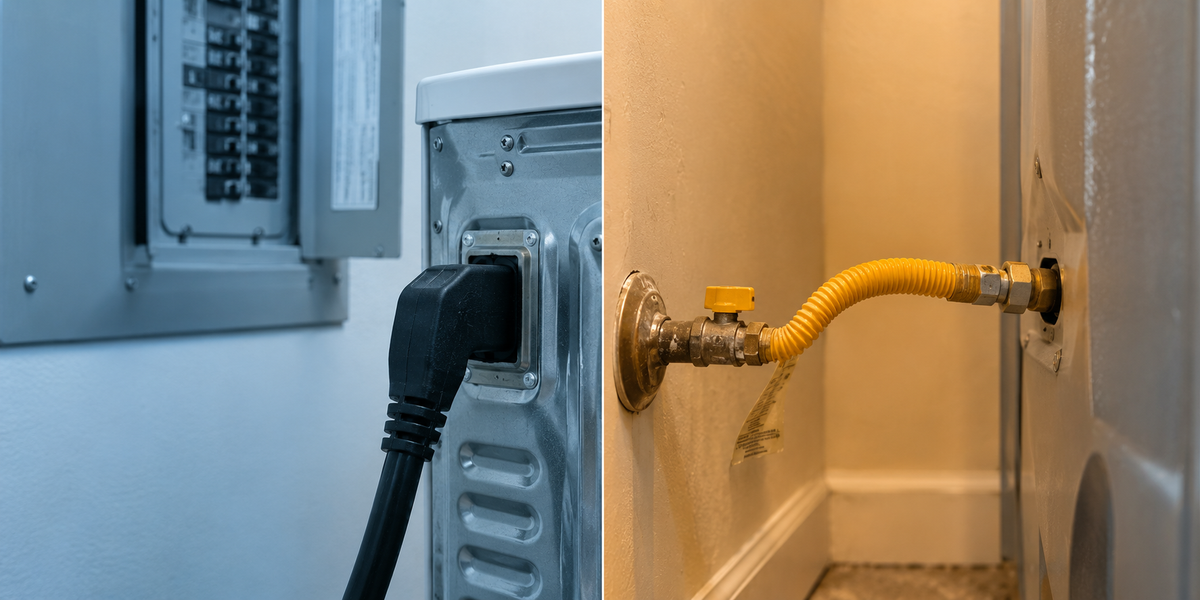
This is the fork most articles gloss over in a single throwaway paragraph. It shouldn't be, because the failure points are genuinely different depending on fuel type.
Electric Dryers, What Usually Fails First
Electric dryers run on a 240V circuit. If one leg of a double-pole breaker trips, the machine often still tumbles, since the motor can run on 120V alone, but the heating element gets starved and produces nothing. Check your breaker panel first. Whirlpool's troubleshooting page lists voltage and power supply issues among the top causes of a no-heat electric dryer.
If the breaker's fine, the heating element itself may be the culprit, particularly if the coil is visibly broken or scorched when you inspect it. Exact healthy resistance values vary by model, so don't trust a generic ohm number floating around online. Pull it from your specific unit's service documentation before you condemn the part.
Gas Dryers, What Usually Fails First
Gas units fail differently. Weak gas valve coils sometimes can't fully open the valve even when the igniter is glowing and working correctly. According to Sears Home Services, this valve coil and igniter failure pattern is one of the most common reasons a gas dryer runs but won't heat.
Here's what that failure actually looks and sounds like, since nobody seems to describe it plainly: you'll hear a click, see the igniter glow orange, and then... nothing. No "whoomph" of ignition. Roughly 30 to 45 seconds later, the safety circuit gives up and shuts things down. If that sequence sounds familiar, the igniter or gas valve coils are the prime suspects.
Also worth checking, and embarrassingly easy to overlook: the manual gas shutoff valve behind the dryer. It gets bumped closed during moves or appliance swaps more often than you'd think.
The One Part Both Types Share, and Usually the Easiest Fix: The Thermal Fuse
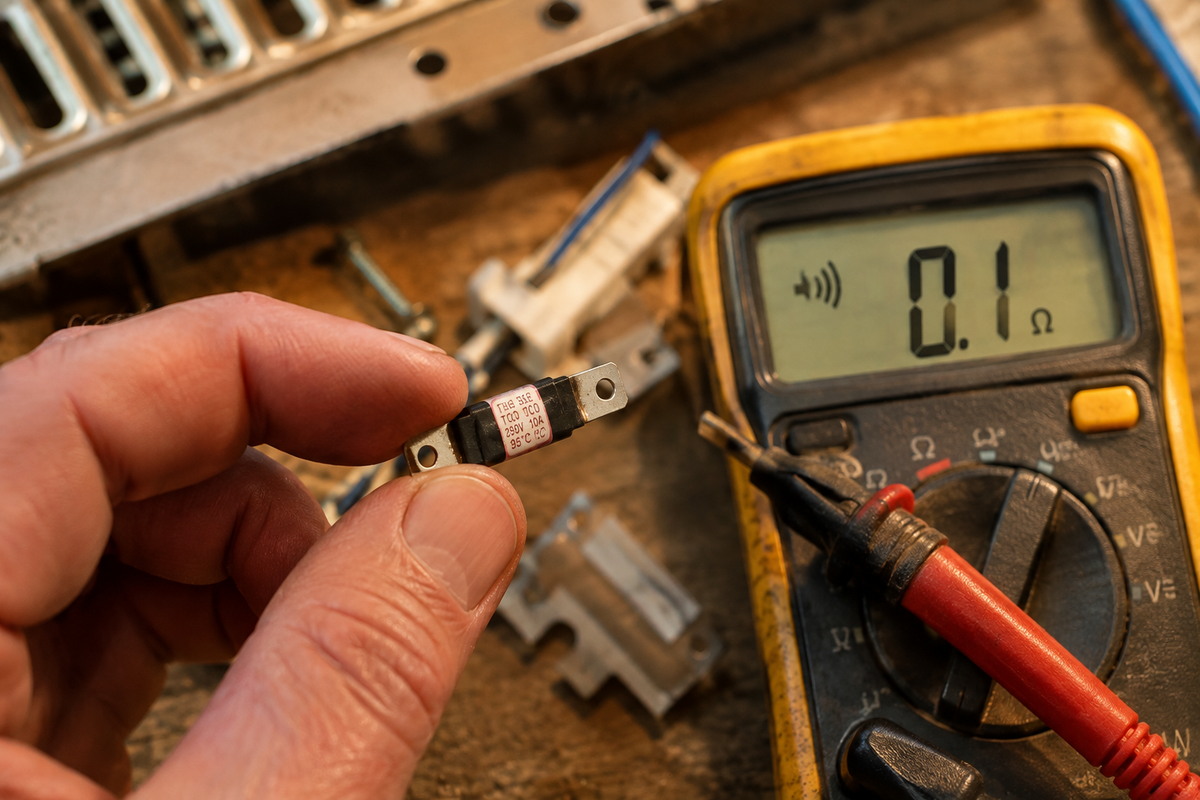
Gas or electric, both machines share one small, cheap, universal component: the thermal fuse. It's the highest-odds check on this whole list, and here's why. It's a one-time safety fuse that blows when internal temperature exceeds a set threshold, almost always because airflow is restricted somewhere downstream. It does not reset itself.
The telltale symptom: the dryer runs, tumbles normally, produces zero heat, and drying times have probably been creeping up for weeks beforehand without you really noticing.
To test it: unplug the dryer completely. Locate the fuse, usually mounted on the blower housing or along the exhaust duct (exact placement varies by brand, so check a parts diagram for your model rather than assume). Set a multimeter to continuity mode and touch the probes to the two terminals. A reading near zero ohms means it's fine. "OL" or infinite resistance means it's blown.
Safety note: Always unplug the dryer before opening any panel. And never bypass or "jump" a blown thermal fuse to get the machine running again. It exists to prevent fires, not to nag you.
Airflow Is the Root Cause Behind Most of the Above, Check the Vent Before You Replace Anything
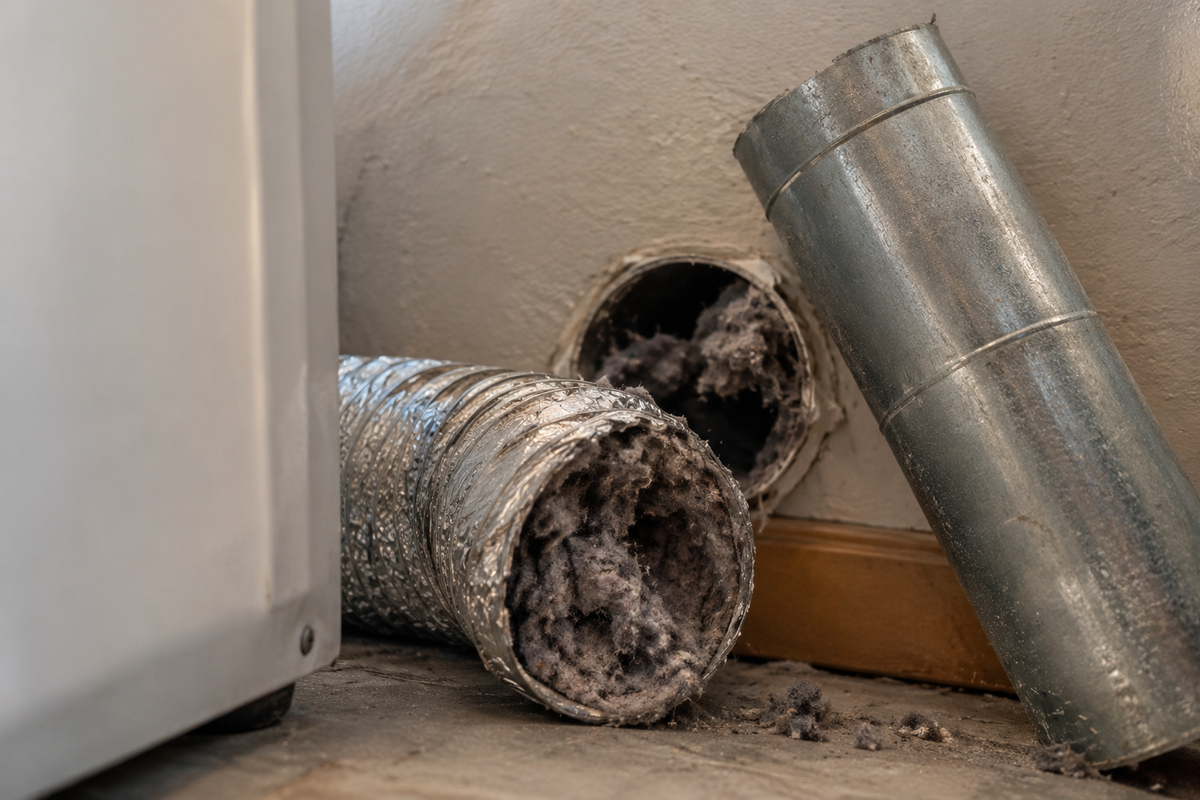
This is where a lot of DIY troubleshooting goes wrong. People replace the thermal fuse, feel accomplished, and never touch the vent, only to blow another fuse three months later. The fuse isn't usually the disease. It's the symptom.
The numbers here are worth sitting with. According to NFPA research, an estimated 15,970 home fires per year involve clothes dryers or washing machines, and dryers account for roughly 92% of those. Failure to clean is the single leading contributing factor. UL Solutions confirms lint buildup in vents and behind the drum as the dominant ignition pathway, alongside a secondary risk most people never consider: spontaneous combustion from oil-stained fabric loads.
So check the vent. Disconnect the hose at the back of the machine and look for a lint plug. Go outside and test the exterior hood flap; it should swing open freely while the dryer runs, not hang stiff or barely budge. And take a hard look at what kind of ducting you're using. Flexible foil or plastic accordion duct is a bad choice, full stop. It traps lint in its ridges and kinks easily. Rigid or semi-rigid metal duct is what manufacturer installation manuals recommend, and that recommendation is worth following, not treating as optional.
Here's a diagnostic marker nobody else mentions: if a full drying cycle now takes noticeably longer than it did a year ago, that's an airflow-degradation trend line worth acting on before a fuse blows, not after.
How to Test Components Safely With a Multimeter
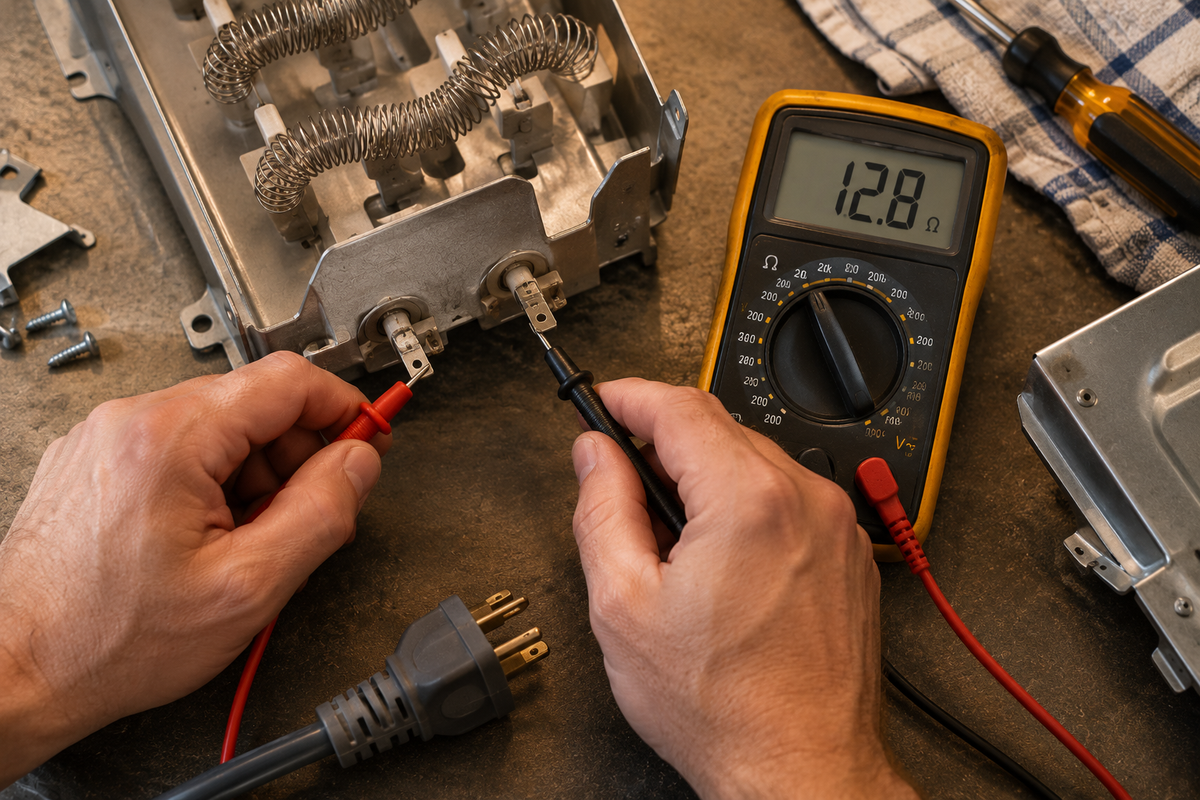
Most articles tell you to "test it with a multimeter" and leave it there. Here's how, step by step.
- Unplug the dryer. For gas units, also confirm the gas shutoff is closed. Never test a live appliance.
- Set your multimeter to continuity or ohms mode.
- Access the part you're testing (heating element, thermal fuse, or thermostat) through your model's panel. On many machines, the relevant screws sit behind the lint trap housing or the rear panel, but this varies by brand.
- Touch the probes to the part's two terminals. A reading near zero ohms, or an audible continuity beep, means the part is intact. "OL" or infinite resistance means it's failed.
- Reassemble only after you've confirmed which part actually failed. Don't guess-and-replace multiple parts at once; it wastes money and tells you nothing.
One more thing worth knowing: dryers don't hold onto residual electrical charge the way an appliance with a compressor might, but it's still good practice to wait a few minutes after unplugging before you dig into a control board area, just as a habit.
When to Stop Troubleshooting and Call a Technician
DIY has limits, and knowing where they are matters more than knowing every possible cause.
Stop the moment diagnosis requires touching gas line connections beyond the shutoff valve. That's a job for a licensed technician or your gas utility, no exceptions.
If you've confirmed the vent is clean and the thermal fuse keeps blowing anyway, that's a sign of a deeper airflow or control-board issue, not something a single part swap will fix.
And if you don't own a multimeter, or you're just not comfortable opening panels, that's a legitimate reason to call someone. It's not a failure on your part.
Cost is the other half of this decision. Thermal fuses typically run cheap, heating elements sit in the middle range, and igniters land somewhere in between, though exact 2026 pricing is worth checking against a current parts retailer before you budget for a repair, since prices shift. As a rough rule of thumb: if your dryer is already 10-plus years old and the repair quote is creeping toward half the cost of a new unit, replacement usually wins out over repair.
A Real Diagnostic Walkthrough
Here's how this actually played out on an electric dryer that stopped heating a few winters back. The symptom was classic: drum tumbling fine, air coming out cold, cycle running its full 50 minutes for nothing. First check was the breaker panel, both legs fine, so power supply was ruled out in under a minute. Next, the heating element, accessed through the rear panel: continuity test read a clean 10.2 ohms, well within range, so that wasn't it either.
That left the thermal fuse, mounted on the blower housing behind the lint trap assembly. Multimeter read "OL," infinite resistance. Blown. But the real cause turned up behind the machine: a flexible foil duct, coiled awkwardly to fit a tight gap, packed solid with lint at the first bend. That restriction had been quietly overheating the fuse for weeks. Swapping the fuse (about ten minutes) and replacing the foil duct with rigid metal duct (another twenty) solved it completely. Total diagnosis time: under 25 minutes, no technician required.