How to Clean a Washing Machine: Complete Step-by-Step Guide
November 12th, 2025
Summary
What: Deep cleaning washing machines involves removing detergent residue, mold, mildew, and bacteria buildup from drum, gaskets, filters, and dispensers using vinegar, baking soda, or commercial cleaners.
Who: Homeowners noticing musty smells, visible mold on door seals, reduced cleaning performance, or clothes emerging from washer with unpleasant odors.
Why: Many manufacturers recommend a deep clean every six months to prevent bacterial growth, extend appliance lifespan, and maintain optimal washing performance.
When: Clean monthly for heavy use, and every 6-12 weeks for moderate or light use, or immediately when detecting odors or visible mold growth.
How: Use natural cleaning methods with vinegar and baking soda through systematic process: clean gaskets, run hot vinegar cycle, scrub dispensers, run baking soda cycle, clean filters, and air dry.
Introduction
Keeping your washing machine clean is an important step in getting your clothes clean. Skip it and you risk the growth of bacteria, mold and musty odors—exactly the environment you’re trying to avoid when washing clothes.
Neglecting your washing machine for too long can lead to big issues with energy efficiency, cleaning performance, and machine lifespan. Detergent residue, fabric softener buildup, hard water minerals, and moisture create the perfect breeding ground for mold and bacteria that transfer directly onto your supposedly clean laundry.
This comprehensive guide reveals exactly how to clean a washing machine using proven methods that eliminate odors, remove buildup, and restore optimal performance. You’ll discover step-by-step instructions for both front-load and top-load washers, learn which cleaning agents work best, and implement maintenance habits that keep your machine fresh between deep cleans.
Why Does My Washing Machine Need Regular Cleaning?
Every wash cycle leaves behind microscopic residue that accumulates over months. Over time, washing machines can develop a buildup of soap residue, fabric softener, and other debris that can cause unpleasant odors and affect the cleanliness of your clothes.
How Buildup Occurs:
High-efficiency detergents concentrate in small water volumes
Liquid fabric softeners create waxy coating on internal surfaces
The damp environment inside the machine can lead to mold and mildew growth, which can pose health risks. Front-load washers face particular vulnerability due to airtight door seals.
Problem Areas:
Rubber door gasket folds trap standing water and organic matter
Detergent dispenser drawer collects moisture and soap scum
Drum interior retains dampness without proper ventilation
Removing the grease and grime that builds up over time can reduce wear and tear on your washing machine’s internal parts, reducing the risk of something breaking.
Performance Degradation:
Heating elements coated with limescale consume more energy
Clogged filters reduce water flow and drainage efficiency
Pump blockages trigger error codes and cycle interruptions
Signs Your Washing Machine Needs Cleaning
Here are a few signs your washer might need a thorough cleaning: Musty smells from the machine or your freshly washed clothes, visible mold or mildew, especially around the door seal.
Additional Warning Signs:
Clothes emerge with unpleasant odor despite washing
Visible residue or film on drum interior
Water remains in gasket folds after cycle completion
Detergent dispenser shows black or pink staining
Machine takes longer to complete cycles
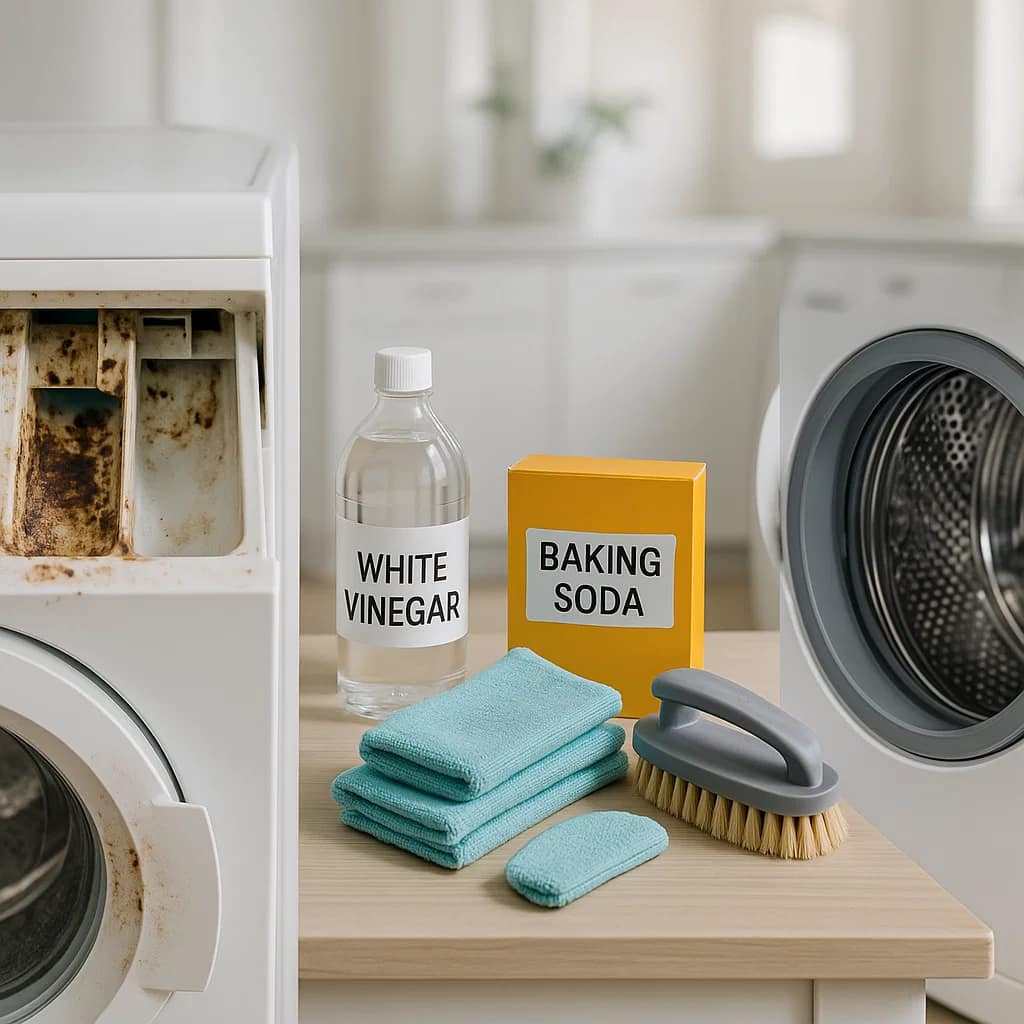
What Supplies Do I Need to Clean My Washing Machine?
Before you begin, gather everything you’ll need to make the job quicker and more efficient.
Essential Cleaning Agents
White Distilled Vinegar (Primary Cleaner): White vinegar is a safe and gentle choice for regularly deep cleaning your washing machine. It effectively removes buildup and won’t damage your machine’s components.
Purchase: 2-3 cups needed per cleaning
Function: Dissolves mineral deposits, kills bacteria, removes odors
Liquid Chlorine Bleach (For Severe Mold): If you have a mold or mildew problem, use bleach instead. Use it sparingly, ventilate your space, and always follow safety precautions.
Caution: Always check your owner’s manual before cleaning as it is not recommended for certain types of washing machines
Ventilation: Open windows, run exhaust fan
Tools and Materials Required
Cleaning Tools:
Microfiber cloths (3-4 for different areas)
Old toothbrush or small scrub brush for tight spaces
Spray bottle for vinegar solution
Bucket or large bowl for soaking parts
Rubber gloves for hand protection
Shallow pan or towels for filter water drainage
Optional Supplies:
Commercial washing machine cleaning tablets
Essential oils (lemon, eucalyptus) for fragrance
Magic eraser sponges for stubborn stains
Flashlight for inspecting dark areas
How Do I Deep Clean a Front-Load Washing Machine?
When deep cleaning your front-load washing machine, you must (1) clean the drum and gasket, (2) run a hot vinegar cycle, (3) scrub the detergent drawer and seals, (4) run a baking soda cycle, and (5) clean the filter and dry.
Step 1: Clean the Rubber Door Gasket
Start with a completely empty machine so you can reach every corner easily. Gently pull back the rubber gasket around the door, this spot often hides trapped water, lint, hair, and sometimes mold or mildew.
Detailed Process:
Inspect the Gasket Thoroughly
Pull rubber seal away from drum exposing all folds
Check for trapped debris, coins, small clothing items
Identify areas with visible mold or discoloration
Use flashlight to inspect deepest creases
Apply Cleaning Solution
For visible mold, apply a 50/50 mix of vinegar and water, let it sit for a few minutes
Spray solution generously into all gasket folds
Allow 10-15 minutes contact time for severe mold
For stubborn stains, apply straight vinegar
Scrub Thoroughly
Use microfiber cloth to wipe all accessible surfaces
Employ old toothbrush for tight crevices and stubborn mold
Scrub in circular motions applying moderate pressure
Repeat until no black residue transfers to cloth
Dry Completely
Wipe gasket with clean dry cloth
Ensure no moisture remains in folds
Leave door open for air circulation
Step 2: Run Hot Vinegar Cleaning Cycle
Start your hottest cycle and then pour 2 cups of vinegar into the detergent dispenser.
Detailed Process:
Prepare Machine
Ensure drum is completely empty
Close door securely
Select cycle settings
Add Vinegar
Pour 2 cups white distilled vinegar into detergent drawer
For machines without dispenser, pour directly into drum
Do not add detergent or other cleaning agents
Select Proper Cycle
Choose hottest water temperature available (ideally 60°C/140°F+)
Select longest cycle duration
If available, use “Clean Washer” or “Tub Clean” setting
Start cycle immediately
Allow Full Cycle Completion
Let machine run completely without interruption
Vinegar breaks down mineral deposits and residue
Hot water kills bacteria and dissolves buildup
Total time: 1-2 hours depending on cycle
Step 3: Clean Detergent Dispenser Drawer
While the machine is running, tackle the detergent drawer. Remove the drawer fully (most have a release tab). Soak it in warm, soapy water. Scrub with an old toothbrush to remove caked-on detergent and softener.
Detailed Process:
Remove Dispenser
Press release button or tab while pulling drawer
Completely extract drawer from housing
Remove removable inserts (bleach and softener caps)
Soak Components
Fill bucket with hot water
Add dish soap or 1 cup vinegar
Submerge all dispenser parts
Soak 30-60 minutes to loosen buildup
Scrub Thoroughly
Use toothbrush on all compartments and crevices
Pay special attention to fabric softener compartment
Scrub siphon tubes and small openings
Remove all visible residue and staining
Clean Housing Cavity
Wipe inside dispenser cavity with vinegar-dampened cloth
Use toothbrush for hard-to-reach corners
Remove all visible mold or soap scum
Dry thoroughly before reinserting drawer
Step 4: Run Baking Soda Cycle
Once that cycle is finished start another cycle by putting ½ cup of baking soda in the drum and running the same hot water cycle.
Detailed Process:
Add Baking Soda
Sprinkle ½ cup baking soda directly into empty drum
Do not add to dispenser drawer
Evenly distribute around drum interior
Run Second Hot Cycle
Select same hot water temperature as vinegar cycle
Choose normal or heavy-duty cycle
Allow complete cycle without interruption
Baking soda neutralizes vinegar odor and lifts remaining residue
Step 5: Clean the Drain Pump Filter
Finish by clearing the drain pump filter, usually found at the bottom front of the machine: Place a shallow pan or towels underneath. Open the filter cap carefully (some water will drain out). Remove debris like lint, coins, or hair, then rinse the filter under running water.
Detailed Process:
Locate Filter Access
Check bottom front panel for small access door
Consult owner’s manual if location unclear
Gather towels and shallow pan
Prepare for Water Release
Place pan directly under filter area
Lay towels around work area
Expect 1-2 cups of water drainage
Remove and Clean Filter
Slowly unscrew filter cap counterclockwise
Pull filter assembly straight out
Remove all trapped debris (lint, hair, coins, buttons)
Rinse filter thoroughly under running water
Scrub filter screen with soft brush
Clean Filter Housing
Shine flashlight into filter cavity
Wipe interior with damp cloth
Remove any visible debris or buildup
Ensure drain pump propeller spins freely
Reinstall Securely
Insert clean filter back into housing
Screw cap clockwise until hand-tight
Close access panel
Run quick rinse cycle to verify no leaks
Step 6: Final Wipe Down and Air Dry
Finally, leave the door and detergent drawer open for a few hours. This allows moisture to evaporate fully, preventing new mold growth and keeping your washer fresh.
Detailed Process:
Wipe All Surfaces
Clean drum interior with microfiber cloth
Wipe door glass inside and out
Clean control panel and exterior surfaces
Dry all visible moisture
Ensure Proper Drying
Leave door wide open minimum 2-4 hours
Pull detergent drawer partially out
Position machine in well-ventilated area
Consider small fan for faster drying if needed
How Do I Deep Clean a Top-Load Washing Machine?
Cleaning your top-load washing machine involves five steps: (1) fill with hot water and add cleaner, (2) let it soak to loosen residue, (3) run a wash cycle, (4) scrub the agitator and lid, and (5) rinse and dry.
Step 1: Fill with Hot Water and Add Vinegar
Fill the top-loading washer with hot water and add two cups of white vinegar.
Detailed Process:
Set Machine to Hot Water
Select largest load size setting
Choose hottest water temperature
Start cycle to begin filling
Add Vinegar at Proper Time
Allow tub to fill completely with hot water
Pause cycle once full (before agitation begins)
Pour 2 cups white vinegar directly into water
Close lid briefly then reopen
Step 2: Soak to Loosen Buildup
Pause the cycle after the tub fills with water and allow the vinegar and water mixture to soak for an hour.
Detailed Process:
Allow Extended Soak Time
Leave machine paused with water and vinegar mixture
Soak minimum 1 hour for moderate buildup
Extend to 2-3 hours for severe residue
Vinegar penetrates and dissolves deposits
While Soaking, Clean Exterior
Wipe down exterior surfaces with vinegar solution
Clean control panel and knobs
Wipe lid top and edges
Clean any visible mold or soap scum
Step 3: Add Baking Soda and Complete Cycle
After an hour, add one cup of baking soda and restart the machine. Run another complete wash cycle on the hottest setting.
Detailed Process:
Add Baking Soda
After soak period, add 1 cup baking soda directly to water
Mixture will fizz briefly
This reaction helps lift loosened residue
Complete Full Wash Cycle
Restart machine to resume cycle
Allow full agitation cycle
Let machine complete drain and spin
Total cycle time: 45-60 minutes
Step 4: Scrub Agitator, Drum, and Lid
Use a scrub brush and a solution of equal parts water and vinegar to clean the agitator, drum, and other visible surfaces.
Detailed Process:
Clean the Agitator
If the agitator has a removable cap, you may be able to gently remove it and manually clean the inside with a cloth or scrub brush
Scrub all agitator surfaces with vinegar solution
Use toothbrush for crevices between fins
Remove fabric softener dispenser if present and clean separately
Scrub Drum Interior
Wipe entire drum circumference
Pay attention to area under rim
Clean any visible residue or staining
Use magic eraser for stubborn marks
Clean Lid and Rim
Scrub underside of lid thoroughly
Clean rim where lid closes
Wipe down lid top surface
Remove any visible mold or soap buildup
Step 5: Run Rinse Cycle and Dry
Wipe down the interior and exterior of the machine with a clean cloth.
Detailed Process:
Final Rinse
Run one additional hot water rinse cycle
No additives needed
Ensures all vinegar and baking soda removed
Prevents residue on next laundry load
Dry Thoroughly
Wipe all surfaces with clean dry cloth
Leave the washing machine door or lid open after cleaning to allow it to dry
Prop lid open minimum 2-4 hours
Ensure complete moisture evaporation
Special Considerations for Agitator Models
For an extra deep clean, clean the filter and agitator: Consult your owner’s manual to see how to remove the agitator and washing machine filter. Unplug the machine before removing any parts.
Deep Agitator Cleaning:
Removal Process
For agitator models, use a socket wrench to remove the bolt holding the agitator. Once the bolt is out, reach beneath to lift the agitator from the machine
Place removed parts in cleaning solution
Cleaning Method
Place the agitator into a bucket of hot, soapy water or a DIY cleaning solution of 2 cups of vinegar, 1/4 cup of baking soda and 1/4 cup of water
Soak 30-60 minutes
Scrub with soft brush
Rinse thoroughly and dry completely
Reinstall following manual instructions
What Common Mistakes Should You Avoid When Cleaning?
❌ Mistake 1: Mixing Bleach and Vinegar
Why It’s Problematic: Combining bleach and vinegar creates toxic chlorine gas that causes respiratory damage and can be fatal in enclosed spaces.
✅ Correct Approach:
Use bleach OR vinegar, never both simultaneously
If using bleach first, run complete rinse cycle before vinegar
Wait minimum 24 hours between bleach and vinegar treatments
Vinegar is safer for routine maintenance, reserve bleach for severe mold
❌ Mistake 2: Using Too Much Detergent Daily
Why It’s Problematic: Excess detergent leaves more residue requiring frequent deep cleaning and creates the buildup you’re trying to prevent.
✅ Correct Approach:
Switch from using liquid to powdered detergent and don’t use liquid fabric softener. An appliance repair person gave me the tip to switch to powdered detergent and it definitely helped with odors
Measure detergent precisely with provided cup
Use HE detergent for HE machines
Start with half manufacturer’s recommended amount
❌ Mistake 3: Closing Door Immediately After Cleaning
Why It’s Problematic: Trapped moisture creates perfect environment for rapid mold regrowth, undoing all cleaning efforts within days.
✅ Correct Approach:
Leave the washing machine door or lid open after each load to allow it to dry
Minimum 2-4 hours after deep cleaning
Keep door ajar between all regular wash cycles
Position machine where open door won’t obstruct traffic
❌ Mistake 4: Neglecting the Filter
Why It’s Problematic: Keeping your washing machine filter clean is essential for maintaining optimal performance and preventing unpleasant odors or clogs.
✅ Correct Approach:
Clean filter monthly minimum
Check after washing heavily soiled items
Always inspect during deep cleaning
Keep spare towels nearby for water spillage
❌ Mistake 5: Skipping Owner’s Manual Guidelines
Why It’s Problematic: Always check your washing machine’s use and care guide first for cleaning instructions. Some materials and methods damage specific models.
✅ Correct Approach:
Review manual before first deep clean
Note any manufacturer-specific warnings
Follow recommended cleaning cycle if available
Verify bleach compatibility before use
❌ Mistake 6: Not Removing Clothes Promptly
Why It’s Problematic: Remove wet laundry promptly to prevent mold growth both in machine and on clothing.
✅ Correct Approach:
Set timer or phone alert when cycle completes
Remove clothes within 30 minutes maximum
Never leave wet laundry overnight
If forgotten, rewash with vinegar added
How Do I Maintain My Washing Machine Between Deep Cleans?
Regular maintenance can reduce the need for deep cleaning and keep your washing machine in top condition.
Daily Maintenance Habits
After Every Wash Load:
Leave the washing machine door or lid open after each load to allow it to dry
Wipe down the door seal (for front-loaders) after each use
Remove visible lint or debris from gasket folds
Pull detergent drawer slightly open for airflow
Remove wet laundry promptly to prevent mold growth
Weekly Maintenance Tasks
Here are some weekly practices that help keep your washing machine in top condition: Run an empty hot water cycle with a cup of white vinegar to prevent buildup. Clean the detergent and fabric softener dispensers.
Weekly Routine:
Run one hot water cycle (empty) with 1 cup vinegar
Inspect gasket folds for trapped items
Wipe door glass and exterior surfaces
Check for standing water in dispenser
Monthly Maintenance Schedule
Complete Monthly Tasks:
To keep your washing machine clean, clean it about once a month to eliminate bacteria, dirt and oil, and to prevent mold, mildew and musty odors from building up
Run full vinegar cleaning cycle (2 cups)
Clean filter thoroughly removing all debris
Remove and soak detergent dispenser
Wipe down all exterior surfaces
Inspect hoses for kinks or damage
Quarterly Deep Maintenance
Every 3 Months:
Perform complete deep clean following guide above
Check drainage hose for clogs or standing water
Inspect inlet hose screens for sediment
Test machine level and adjust if needed
Review maintenance log and address any recurring issues
Frequently Asked Questions
How often should I clean my washing machine?
Deep cleaning frequency of your washing machine depends on your usage. Clean monthly for heavy use, and every 6-12 weeks for moderate or light use. Many manufacturers recommend a deep clean every six months. Clean immediately if you notice musty odors, visible mold, or reduced washing performance.
Can I use vinegar and baking soda together to clean my washer?
Use them sequentially, not simultaneously. Turn your washing machine to the hottest and longest cycle. Start your hottest cycle and then pour 2 cups of vinegar into the detergent dispenser. Once that cycle is finished start another cycle by putting ½ cup of baking soda in the drum. This two-step process maximizes cleaning effectiveness.
Is bleach or vinegar better for cleaning washing machines?
White vinegar is a safe and gentle choice for regularly deep cleaning your washing machine. It effectively removes buildup and won’t damage your machine’s components. If you have a mold or mildew problem, use bleach instead. Vinegar works best for routine maintenance, while bleach provides stronger disinfection for severe mold. Never mix them together.
Why does my washing machine still smell after cleaning?
Persistent odors after cleaning indicate trapped water in drain hose, uncleaned filter, mold inside inaccessible drum areas, or plumbing issues. Check that you cleaned all areas including rubber gasket folds, filter, and dispenser drawer. Ensure door remains open between washes for complete drying. If smell persists, inspect drain hose for clogs or standing water.
Can I put washing machine cleaning tablets in the dispenser?
The tablets used for cleaning a washing machine contain enzymes and other chemicals that remove buildup. Drop one tablet of washing machine cleaner into the washer tub. Run on your machine’s clean cycle. Place tablets directly in drum, not dispenser drawer, for maximum effectiveness. Follow package instructions for your specific machine type.
How do I clean a washing machine with hard water buildup?
For hard water mineral deposits, vinegar works particularly well. Vinegar is a strong acid that works really well to dissolve mineral deposits, dirt, grease, grime, and can even kill bacteria. Run 2 cups vinegar on hottest cycle, follow with baking soda cycle, and repeat monthly. Consider installing water softener or using polyphosphate filter for long-term solution.
Should I clean my top-load or front-load washer differently?
Yes, methods differ slightly. When deep cleaning your front-load washing machine, you must clean the drum and gasket, run a hot vinegar cycle, scrub the detergent drawer and seals, run a baking soda cycle, and clean the filter. Top-loaders require filling, soaking, and scrubbing agitator. Front-loaders need extra gasket attention and filter access from front panel.
Conclusion
Regular washing machine cleaning isn’t optional maintenance—it’s essential for appliance longevity, laundry quality, and household health. Cleaning a washing machine can get your clothes cleaner and prolong the life of your appliance while preventing mold, bacteria, and unpleasant odors from developing.
Key Takeaways:
Deep clean every 1-3 months depending on usage frequency, using 2 cups white vinegar followed by ½ cup baking soda on hottest cycle for natural, effective cleaning
Leave door open after every wash for minimum 2-4 hours allowing complete moisture evaporation and preventing mold growth in rubber gaskets and drum interior
Clean the filter monthly removing trapped lint, hair, coins, and debris that create foul odors and reduce machine drainage efficiency
Wipe rubber gasket weekly pulling back folds to remove trapped water, lint, and organic matter before mold establishes in hidden crevices
The entire deep clean takes less than an hour of active work, with most time spent waiting for cycles to complete. This minimal investment prevents expensive repairs, extends appliance lifespan by years, and ensures every load emerges genuinely clean and fresh-smelling.
Make washing machine cleaning part of your regular household routine. Your clothes will smell better, your appliance will perform optimally, and you’ll avoid the costly consequences of neglected maintenance.
Table Of Contents
newsletter signup
Get expert appliance tips, maintenance guides, and exclusive repair discounts delivered to your inbox
Appliquix connects you with certified local appliance repair technicians across the US, Canada, Australia, and Europe. Fast, reliable, and affordable appliance repairs at your doorstep